Improve Shared Connections

How to solve Internet congestion when many users share one Internet connection?

In restaurants, hostels, hotels, guest houses, on university campuses, office environments – whenever a lot of people share the same Internet connection – this Internet connection is often congested and the users experience up to several seconds of delay.

Here cFosSpeed can make a huge difference by prioritizing the traffic to and from the Internet. For example it can detect if a user uploads a bunch of photos or if some device downloads a big software update. cFosSpeed will slightly delay these big data uploads or downloads by reducing the bandwidth by about 1-2%. This reduces the ping time of the whole Internet connection, which allows highly responsive web browsing or even media streaming / VoIP phone calls and game traffic.

The usual state of most shared Internet connections.

This configuration will result in severe connection delays when some of the connected devices start massive up- or downloads, e.g. saving new photos or videos to cloud storage or downloading software updates. The problem can be solved by using the original router (Router A) for the Windows PC only and buying a cheap second WLAN router (WLAN Router B) for shared access.

The new configuration with cFosSpeed prioritizing the entire Internet traffic of the WLAN network.

To improve overall performance, you may want to install an additional Ethernet port on your Windows PC to connect to Router A. We always recommend to use cable connections, since they produce less latency than WiFi.

Extended configuration with cFosSpeed, second LAN connection for improved latency and an additional WLAN Router B2 to increase range.

Connecting the WLAN router

Connect the WAN port of WLAN Router B with the network port of the Windows PC

Setting up the Windows PC

number1

Install cFosSpeed, following the installation instructions

number2

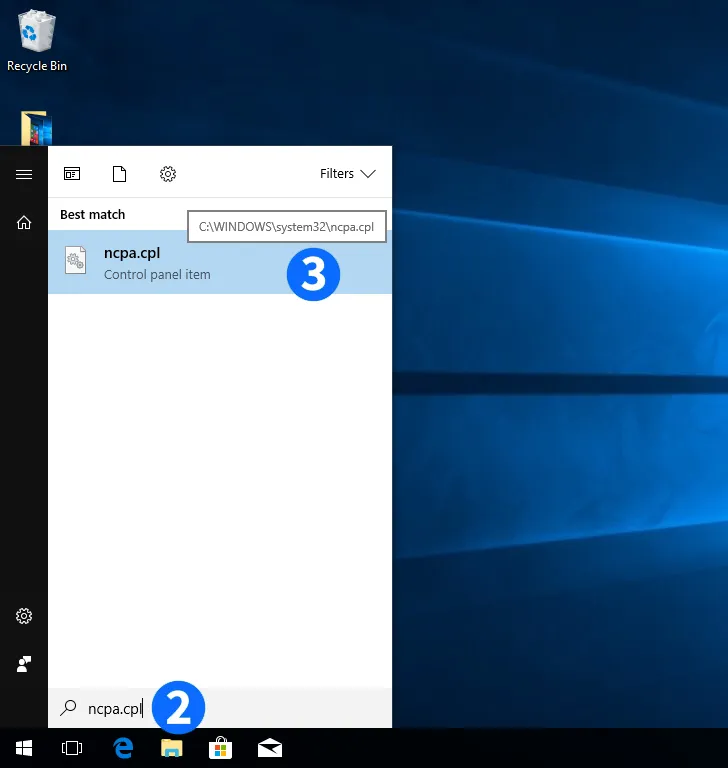
Press the "Windows" key and type ncpa.cpl

number3

Click on the resulting control panel item entry

number4

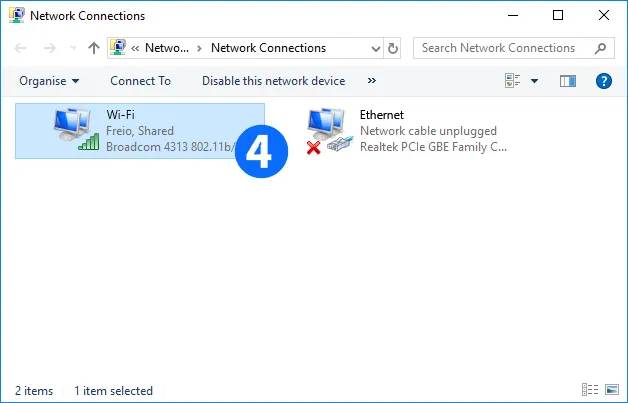
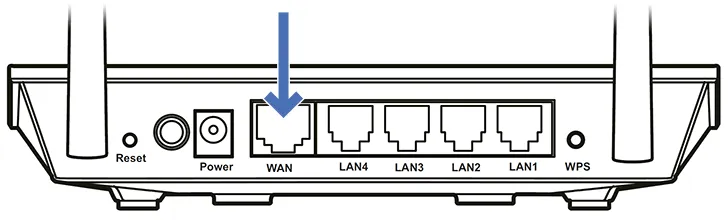
Right-click on the network device you want to share. It is the one that connects the Windows PC to the Internet

number5

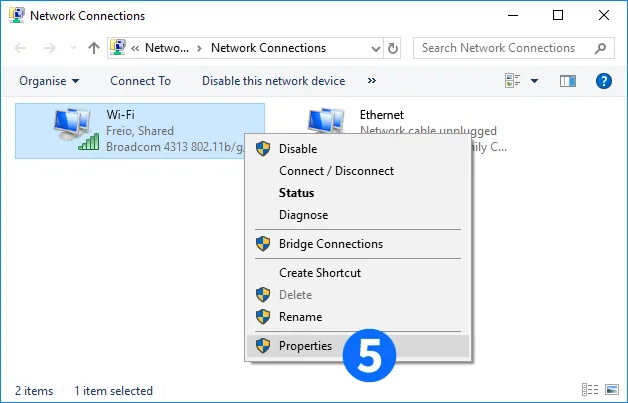
Click on "Properties"

number6

Click on "Sharing"

number7

Click on "Check the upper check box to enable connection sharing. You may want to uncheck the lower box, if it isn't already"

number8

Click on "OK"

number9

The Internet connection on this device is shared now

Note: Newer versions of Windows 10 have a bug which may stop Internet Connection Sharing from working after a reboot.

By using our freeware tool >cFosICS you can fix this.

Setting up the WLAN router

This particular instruction is for the ASUS RT-N12E, which we chose for its moderate price and easy setup. Nevertheless, this kind of connection sharing should work with any other WiFi access router available at your place.

number1

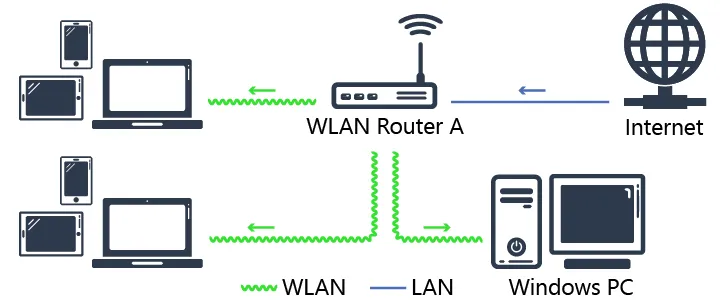
Connect to your router using an Ethernet cable or via WiFi. The router will show up as an open network (no password required) with the SSID ASUS_60. Now enter the router IP address (192.168.1.1) in the address bar of your browser to start setup

number2

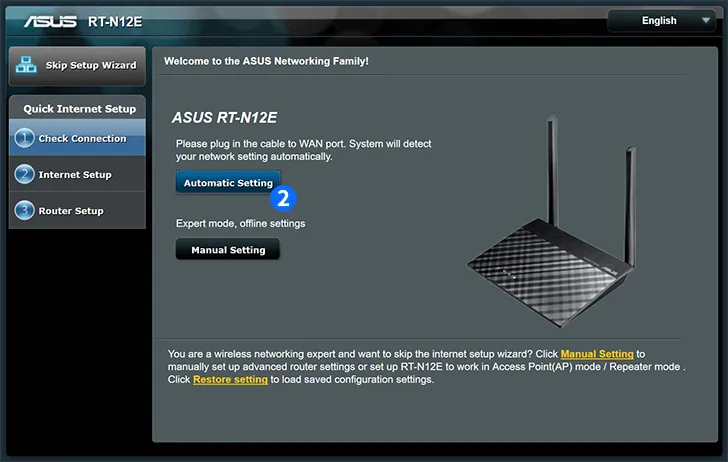
Click on "Automatic Setting"

number3

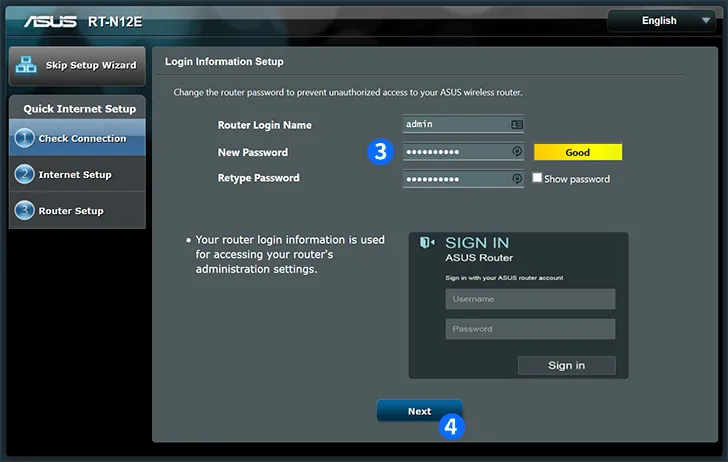
Enter a Router Login Name and the New Password

number4

Click on "Next"

number5

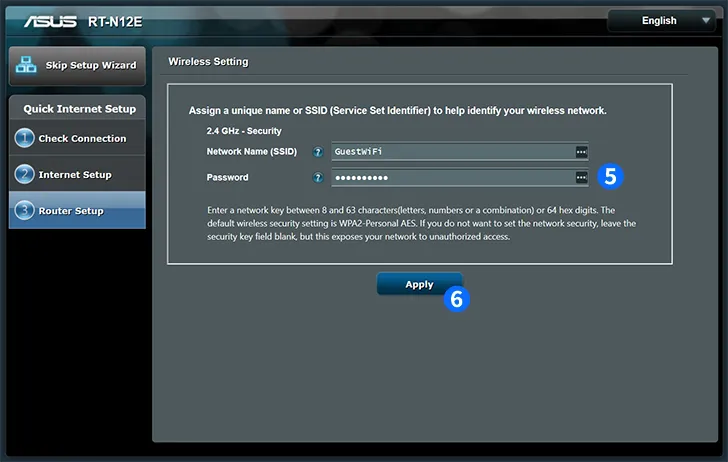
Enter a new SSID (e.g. GuestWiFi) and a WiFi password

number6

Click on "Apply"

number7

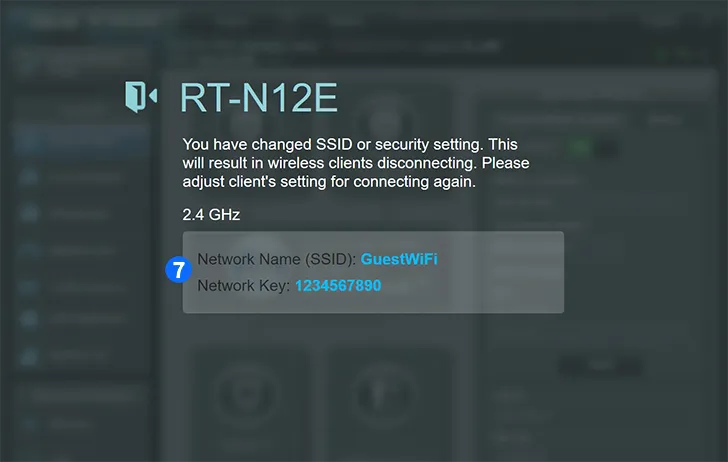
The route will now display a screen showing the new WiFi configuration. You may want to write this down, because it will be needed to connect with the router from now on

number8

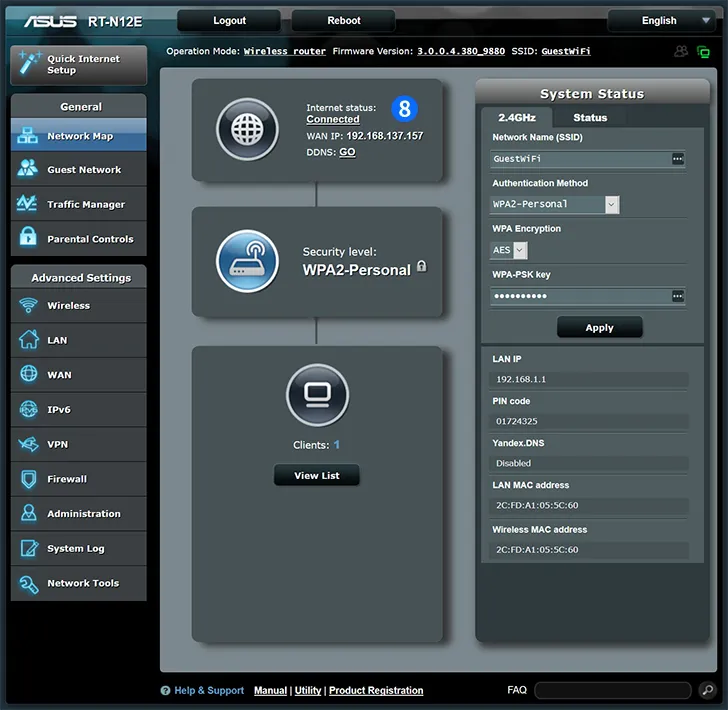
After reconnecting with the newly configured WiFi network, the router will show a page listing its current setup and connection status

Scroll to Top