Enable port forwarding for the TP-Link Archer AX6000
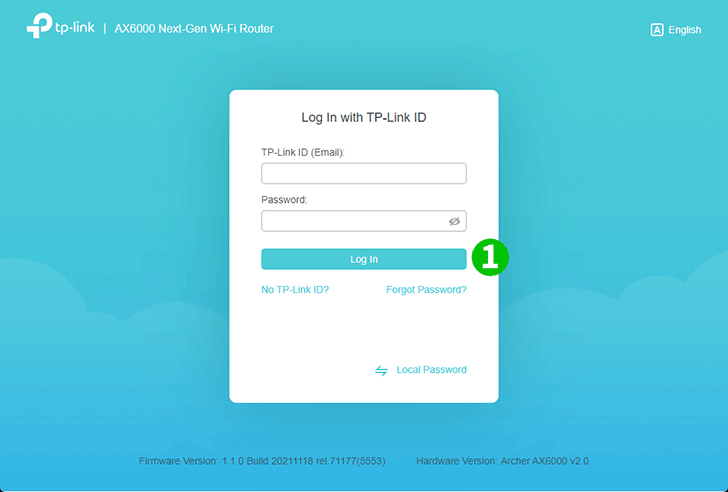
1 With your favorite browser, visit http://tplinkwifi.net and log in.
If you have never logged in, create a login password for secure management purposes. Then click "Let’s Get Started" to log in. If you have registered a TP-Link ID and bound your cloud router to it, log in to the cloud router using your TP-Link ID.
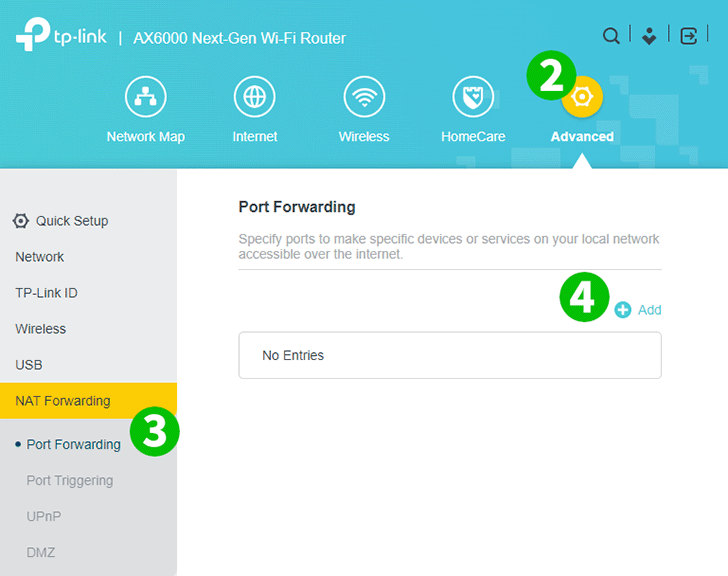
2 Click on the "Advanced" gear icon at the top right.
3 In the left menu, select "NAT Forwarding" and then "Port Forwarding".
4 Click on the "+ Add" button.
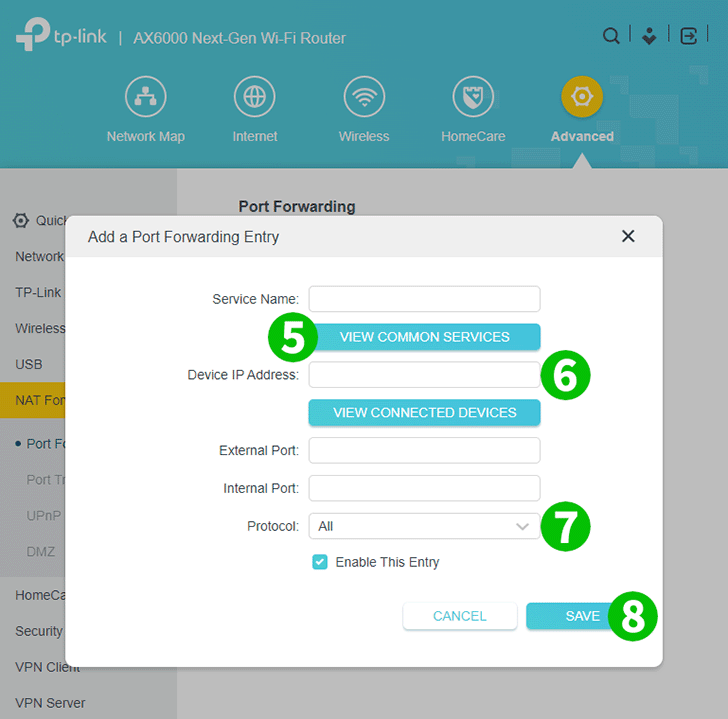
5 Click "VIEW COMMON SERVICES" and select "HTTP". The External Port and the Internal Port are automatically filled (80).
6 In the "Device IP Address" box, type the IP address of the computer on which cFos Personal Net is running. It is a good idea to set a static IP address for your computer.
7 Select TCP on the "Protocol" drop-down.
8 Click "SAVE".
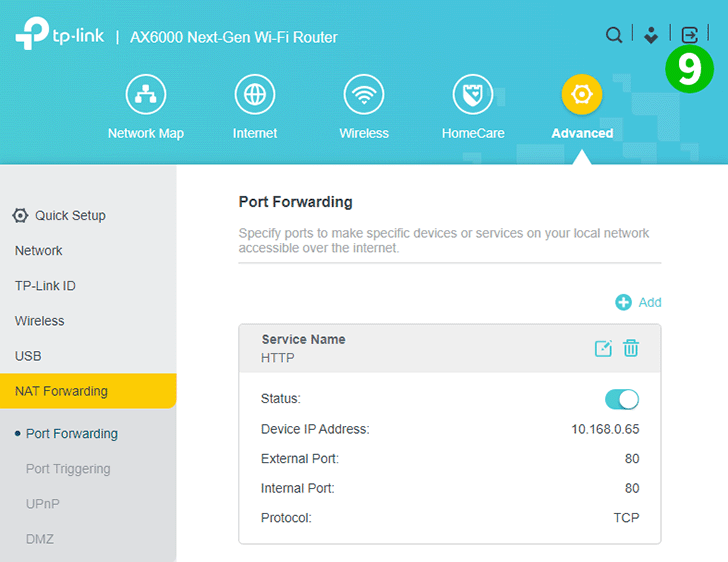
9 To log out, click the icon with an arrow pointing to the right in a square at the top right.
Port forwarding is now configured for your computer!