Enable port forwarding for the D-Link DVG-5102S
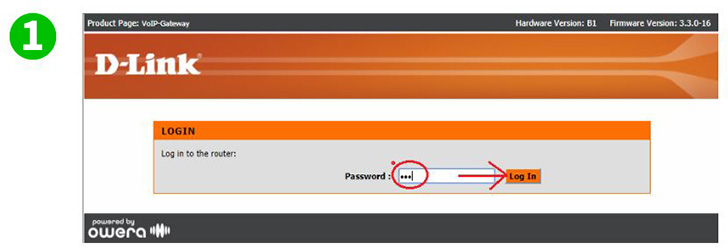
1 Enter the URL of your router into a Internet browser.
At the logon password screen enter the credentials (if you have not changed them from the factory settings the password is admin and is case sensitive).
Click "Log In"
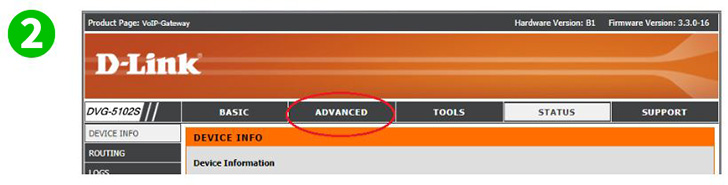
2 Click the "Advanced" tab
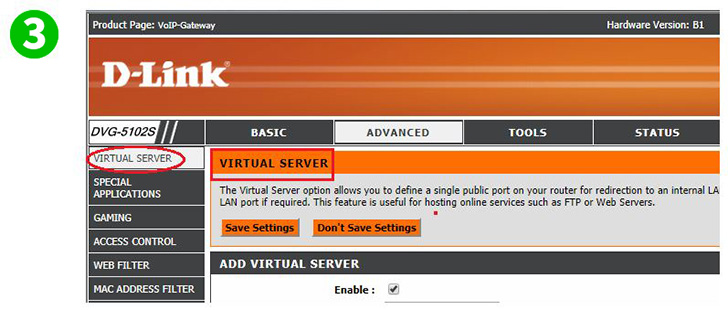
3 It should open to the "Virtual Server" page by default. If it is not, then look at the Menu tree in the left pane at the top you should see "Virtual Server". Click it

4 In the Name field, enter the name you will remember you created the Port Forwarding Rule for. In this version/model this field is character limited to 15 and this includes any spaces you add
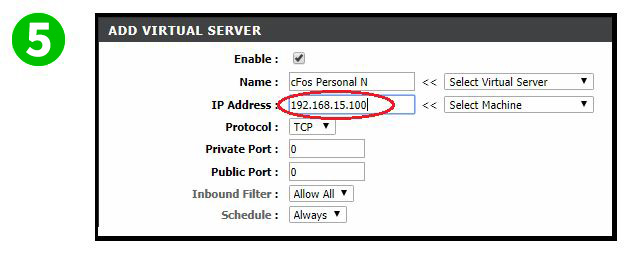
5 In the IP Address field, enter the static IP Address of the computer cFos Personal Net is running on
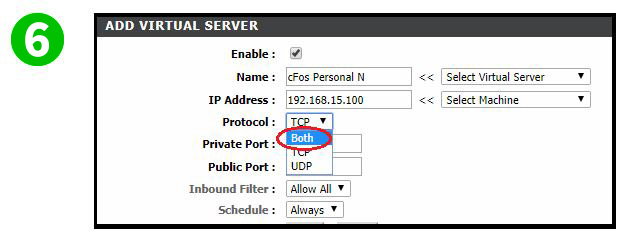
6 For the Protocol your options are TCP or UDP or you can select Both. When in doubt, select Both
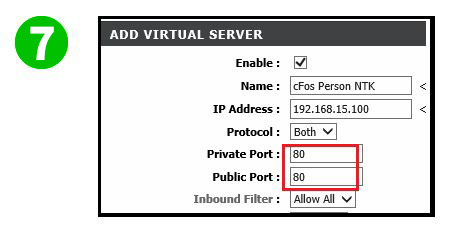
7 Set both of the following triggering ports to the Value of 80
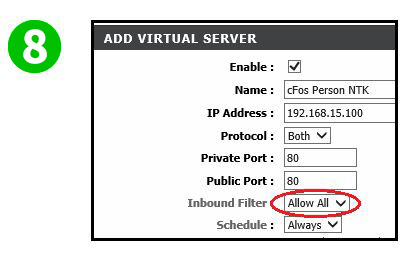
8 Ensure to leave the Inbound Filter set to Allow All
Set Schedule to your own personal preference
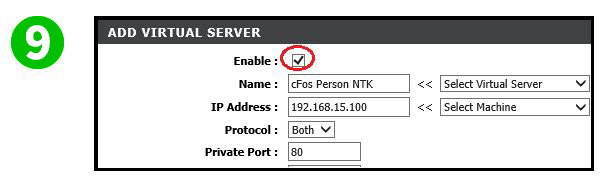
9 Make sure the tick is inside the box to the right of Enable
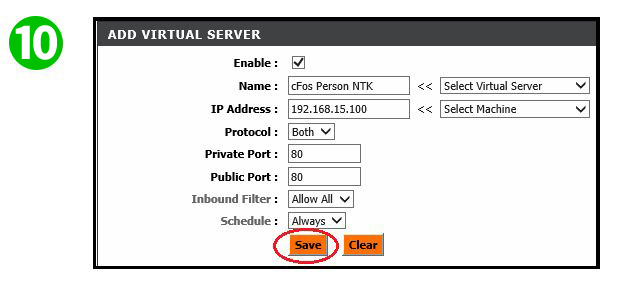
10 Click "Save"
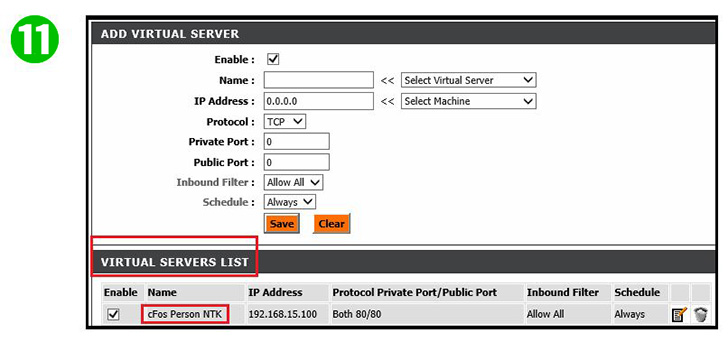
11 You should now see your newly added Virtual Server rule
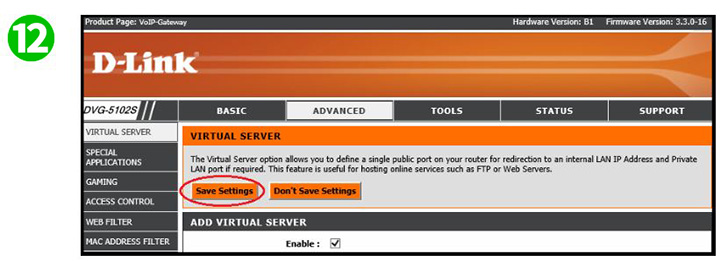
12 Click "Save Setting " so your Router table can refresh and start allowing the new rule to allow server connection
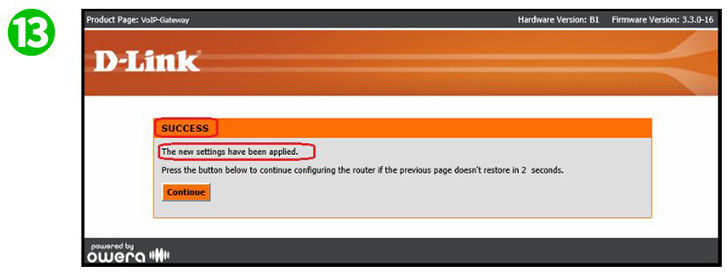
13 The following screen will appear indicating your newly applied rule was successful. You should not have to click "Continue" unless it appears to be taking longer than 2-5 seconds to refresh and re-display the Virtual Server console
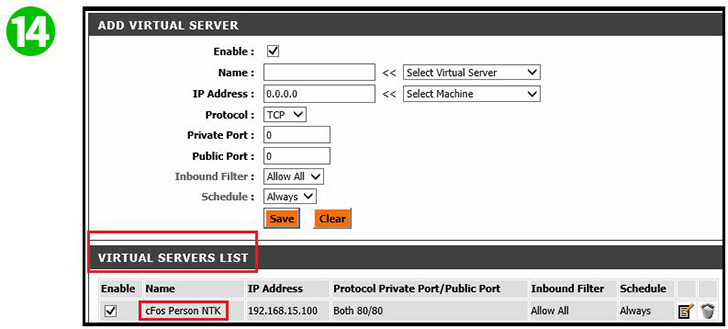
14 Once the refresh has occurred, you should see this window again
Port forwarding is now configured for your computer!